Taking great photos for your Eagle Project report is a skill that helps your hard work shine. Clear, thoughtful pictures show the story of your project and make your report memorable for reviewers. Good photos also help you remember the teamwork, effort, and leadership that went into your project. In this guide, you’ll learn how to plan, take, and organize photos that capture every important stage of your project.
Knowing what photos to take and how to take them can make a big difference at any stage, from starting your project to preparing your final report. This article breaks down the process step by step, with practical tips and examples to help you document your Eagle Project like a pro.
Why Photos Matter in Your Eagle Project Report
Photos are the single most powerful tool you have to show your leadership and the real impact of your Eagle Scout project. When your board of review sits down with your project report, they’re looking for evidence that you planned, led, and delivered something meaningful for your community. Clear, well-organized photos tell that story in a way that words alone simply cannot.
Visual documentation makes your report significantly more engaging and easier to understand. Consider how the reviewer might feel, having read dozens of Eagle project reports. The ones with strong photo documentation stand out immediately because they can see your leadership in action, witness the transformation you created, and understand the scope of work involved.
Good photo documentation also serves future Scouts who want to learn from your project approach. Many councils keep successful Eagle project reports as examples for other Scouts to study. Your photos might inspire the next Scout’s project or help them understand how to tackle similar challenges in their own community.
Most importantly, photos provide concrete proof of your planning, teamwork, and the results you achieved. The BSA’s Eagle Scout Service Project Workbook specifically asks for before and after photos because they validate that your project actually happened and created the impact you claimed.
What Types of Photos Should You Include?
Before photos show the original state or problem your project will address. These establish the baseline and help reviewers understand why your project was needed. If you’re building a trail, show the overgrown area. If you’re organizing a food drive, photograph empty shelves at the food bank.
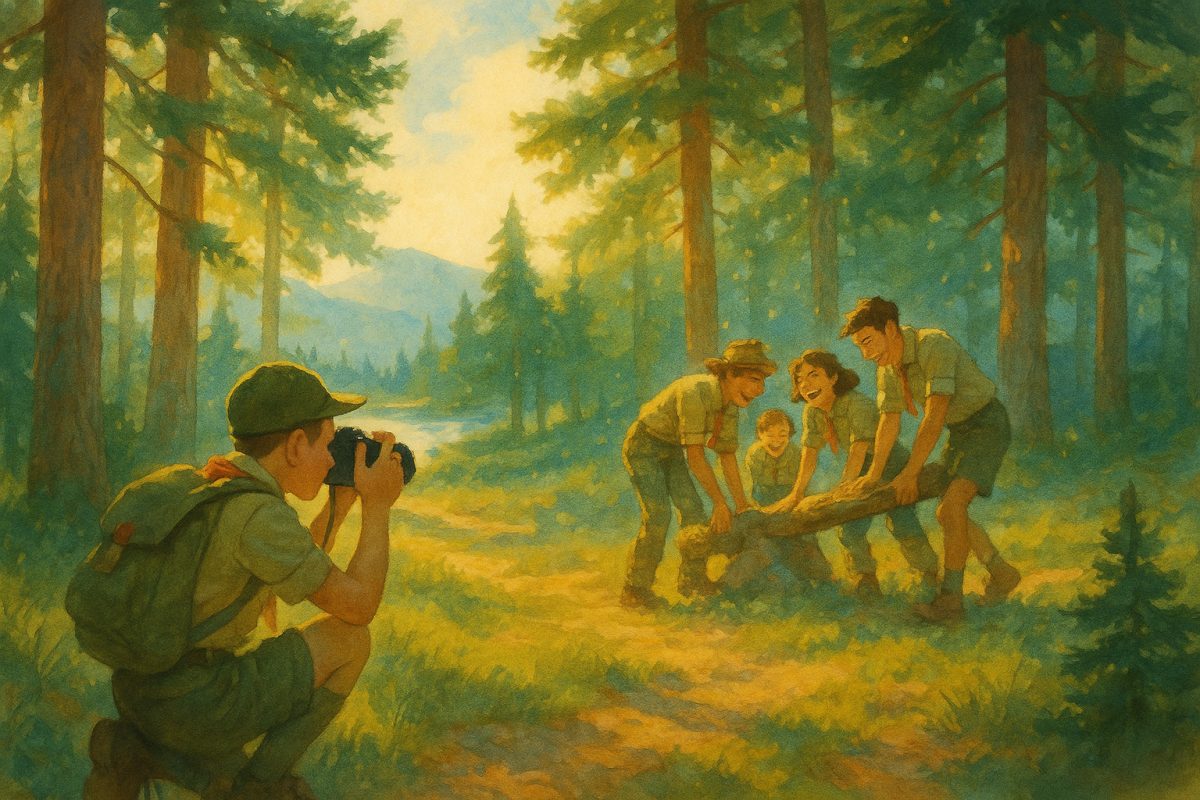
During photos capture key steps, teamwork, and your leadership in action. These are often the most valuable because they show you actively leading volunteers, coordinating work, and solving problems as they arise. Make sure you’re visible in several of these photos, clearly directing the work or teaching others.
After photos highlight the finished project and its impact. These should clearly demonstrate the transformation you created. Take multiple angles and include people using or benefiting from your completed project when possible.
People photos include group shots of volunteers and action shots of Scouts working. Always get permission before photographing anyone, especially minors. These photos show the scale of your volunteer coordination and the teamwork you facilitated.
To see excellent examples of project documentation in action, this video walks through the entire Eagle project process with specific emphasis on photo requirements and reporting best practices:
The video provides a detailed guide to completing the Eagle Scout Project Workbook, breaking it down into three parts: the Proposal, Plan, and Report. It emphasizes the importance of thorough documentation, obtaining necessary signatures, and maintaining detailed project plans. Additionally, it highlights the need for clear, well-organized photos and time logs to effectively showcase leadership and project impact, while stressing the importance of staying on top of the process to avoid delays.
The key insight here is understanding the relationship between your specific documentation efforts and the actual results in your board of review. If your photos clearly show leadership, planning, and impact, your board will have confidence in your project. If your photos are unclear or missing key elements, even an excellent project might face questions or delays.
Planning and Organizing Your Photo Process
The difference between a mediocre Eagle project report and one that truly showcases your leadership comes down to preparation. While most Scouts think about photography after their workday, the best documentation is planned in advance, before you even pick up a shovel. Your photos need to tell the complete story of your project, and that story starts with intentional planning.
Think of photo planning like any other project management task. You wouldn’t show up to a workday without knowing what tools you need or who’s doing what job. The same logic applies to capturing your project’s impact. When you plan your photography process upfront, you free yourself to focus on leading while still getting the documentation you need for your report.
Make a Photo Checklist
Start by listing every moment you want to capture before your project begins. This goes beyond the obvious shots, like “before and after” photos. Think through the specific leadership moments, problem-solving instances, and teamwork examples that will strengthen your report. Write down scenes like volunteers learning a new skill, you explaining the next steps to your crew, or the moment when a major milestone gets completed.
Assign someone to help take photos if you’ll be busy leading. Many Eagle candidates make a critical mistake by trying to document everything themselves while also managing volunteers, solving problems, and keeping the project on track. You can’t be an effective leader and photographer at the same time. Choose a reliable Scout or adult volunteer who understands your project goals and can capture key moments while you focus on leadership.
Make sure you have permission to photograph everyone involved. This step protects both you and your volunteers. Send a quick message to parents before the workday explaining that you’ll be taking photos for your Eagle project report. Most families are happy to help, but getting permission upfront prevents awkward conversations later and ensures you can use all your best shots.
Gather the Right Equipment
You don’t need professional camera gear to document your Eagle project effectively. A smartphone with good resolution will capture everything you need, as long as you use it thoughtfully. The key is making sure your equipment won’t fail you during crucial moments. Check your phone’s storage space before each workday and delete unnecessary apps or photos to make room.
Bring extra batteries or a portable charger to every workday. Nothing derails photo documentation faster than a dead phone halfway through your project. Pack your charger the night before each workday along with your work gloves or water bottle, treating it as essential equipment.
Consider using wide-angle mode to fit more of the scene into your shots. This technique helps capture the full scope of your project and shows the scale of work being accomplished. Wide shots work especially well for group photos and before/after comparisons where you want to show the entire area being improved.
Organize a Photo Day (if needed)
For large projects that span multiple weeks, schedule a dedicated day to focus on photography with volunteers. This approach works particularly well if your regular workdays are too hectic for thorough documentation or if you want to capture specific angles and moments that tell your project’s story more completely. A photo day lets you recreate key processes, gather all your volunteers for group shots, and document details that might have been missed during busy work sessions.
Communicate with your team about bringing devices or provide cameras for the photo day. Let volunteers know in advance what you’re planning so they can dress appropriately and bring any personal cameras or phones if they want copies of the photos. Clear communication prevents confusion and helps everyone contribute to documenting your project’s impact.
Successful Eagle candidates treat photography as a core project management skill rather than an optional task. When you plan your documentation process with the same attention you give to scheduling volunteers or ordering materials, your report becomes a powerful showcase of both your project’s impact and your leadership growth.
Taking Great Eagle Project Photos
Great project photos don’t happen by accident. They require the same planning and attention to detail that you put into the project itself. What separates average from outstanding documentation is intentionality in what and how you capture.
Tips for Capturing Quality Images
Frame your subject so the main action is clear. This means getting close enough that viewers can see exactly what’s happening without having to guess. If you’re documenting volunteers building a trail bridge, don’t shoot from 50 feet away where people look like tiny figures. Move in close enough to show their faces, the tools they’re using, and the specific work being done.
Use fill flash outdoors to avoid harsh shadows, especially during midday work sessions. Natural sunlight creates strong shadows that can hide important details or make faces difficult to see. Your camera’s flash will fill in these dark areas and create more balanced lighting that shows both the work and the people clearly.
Ask volunteers to look at the camera for group shots, but don’t forget to capture candid moments that show teamwork and emotion. The posed group photo is valuable, but candid shots, such as Scouts working together or a volunteer’s expression after a challenge, can better showcase your leadership and project impact.
Stand so your shadow does not block the subject. This sounds basic, but it’s easy to forget when you’re focused on getting the right angle. Before taking each shot, glance down to see where your shadow falls and adjust your position if needed.
Documenting Each Stage
Take wide shots to show the whole area at each major phase of your project. These overview shots provide context that close-ups can’t capture. They show the scale of the work, the number of people involved, and how the project fits into its surroundings. Start each work day with a wide shot of the area, then take another one at the end to show the day’s progress.
Get close-ups of important details or steps that demonstrate specific skills or techniques. If your project involves building something, photograph the joint connections, the measuring process, or the specialized tools being used. These detail shots prove that real work happened and show the quality of the craftsmanship.
Photograph your project crew while they work, rather than just posing for the camera. Action shots of people actually doing the work are more compelling than staged photos. They show leadership in action, teamwork happening naturally, and the real effort that went into completing the project.
Record each major milestone or change throughout the project timeline. Don’t wait until the end to start taking photos. Document the “before” condition, each significant step of progress, and the final “after” result. This creates a visual story that reviewers can follow from start to finish.
The video below provides excellent guidance on organizing and labeling your project photos systematically, which will save you hours when it’s time to compile your final report.
The YouTube video discusses effective image management strategies, focusing on organizing photos efficiently. It covers a six-step process for handling digital images, including downloading, quality editing, renaming, applying color labels, keywording, and final filing. The speaker emphasizes the importance of consistency and efficiency in organizing images, using tools like Lightroom and Photo Mechanic to streamline the workflow. The goal is to make it easier to find images later while saving time through repeatable processes.
| Stage | Photo Ideas | Notes |
|---|---|---|
| Before | Area overview, problem spots | Take from multiple angles |
| During | Volunteers working, materials, steps | Action and group shots |
| After | Completed project, happy team | Smiles, impact, details |
Successful Eagle candidates use photography to document leadership, rather than just to record events. Your photos should show you directing the work, solving problems, and coordinating with volunteers. These leadership moments are what the board of review wants to see, and they’re what will make your project report stand out from others.
Organizing and Presenting Photos in Your Report
Once you’ve captured great photos throughout your Eagle project, the next step is turning them into a powerful visual story that supports your written report. The way you organize and present your photos can make the difference between a confusing collection of images and a clear demonstration of your leadership and project impact.
Sorting and Selecting Your Best Images
Start by gathering all your photos in one digital folder and prepare to be ruthless in your selection process. You’ll likely have dozens or even hundreds of photos, but your report only needs the clearest, most meaningful ones that tell your project’s story effectively.
Choose photos that are sharp, well-lit, and show clear action or results. Blurry images or duplicates that show the same thing from slightly different angles will only clutter your report and distract from your main message. If you have multiple shots of the same activity, pick the one where faces are visible, the work is most apparent, or the impact is clearest.
Arrange your selected photos in chronological order following the before, during, and after sequence. This natural progression helps readers understand your project’s timeline and see the transformation you accomplished. Your “before” photos should clearly show the problem or need you addressed, while “during” shots demonstrate the work process and team effort, and “after” images showcase the completed results.
Adding Captions and Context
Every photo in your report needs a caption that explains what’s happening and why it matters to your project. Write short, specific captions that identify who is in the photo, what activity is taking place, and how it connects to your project goals. Instead of writing “Volunteers working,” try “Patrol members Jake and Maria installing the new trail markers along the main hiking path.”
Your captions should highlight the leadership skills you demonstrated and the teamwork you coordinated. When you appear in photos directing work or explaining tasks to volunteers, mention this in the caption. For example: “Leading the morning safety briefing before beginning construction on the new picnic tables.” This helps the Eagle board understand your active role in managing the project.
Including Photos in Your Report
Place photos strategically throughout your written report, positioning them near the text sections they support. If you’re describing the site preparation phase, include your “before” photos in that section rather than grouping all images at the end. This integration helps readers follow your narrative and see the evidence for your written descriptions.
Create a logical flow by using photos to break up long sections of text while maintaining the story’s momentum. If you have more photos than can fit naturally within your main report, create an appendix with additional images organized by project phase or work day.
Make sure your report remains easy to follow and visually appealing by balancing text and images appropriately. Too many photos can overwhelm readers, while too few might leave them questioning the scope of your work. Aim for 2-3 key photos per major project phase, with additional detail shots as needed to demonstrate specific skills or challenges you overcame.
| Photo Type | Best Placement | Caption Focus |
|---|---|---|
| Before shots | Project description section | Problem identification and scope |
| Work in progress | Implementation sections | Leadership actions and teamwork |
| Completed results | Conclusion and impact sections | Measurable outcomes and benefits |
Remember that your photos serve as evidence of your project’s success and your leadership development. Each image should contribute to demonstrating either the scope of work accomplished, the number of people you coordinated, or the positive impact you created for your beneficiary. When organized thoughtfully with clear captions and strategic placement, your photos become powerful tools that support your advancement to Eagle Scout.
Quick Takeaways
- Planning your Eagle project photos ahead of time makes the difference between a strong report and a scrambled mess. Most Scouts realize too late that they need documentation, then spend hours trying to recreate what happened or hunting down photos from other people’s phones. The smart approach is treating photography as part of your project plan from day one.
- Capture photos during three critical stages: before you start work, while the project is happening, and after everything is complete. Before photos show the problem you’re solving or the area that needs improvement. During photos demonstrate your leadership, teamwork, and the actual work being done. After photos prove the impact and completion of your project. This three-stage approach tells the complete story of your leadership and service.
- Assigning someone to help with photography removes the burden from your shoulders while ensuring nothing gets missed. Choose a reliable Scout, parent, or volunteer who understands the importance of documentation. Give them specific instructions about what types of shots you need and when to take them. Having a dedicated photographer means you can focus on leading your project instead of constantly stopping to grab your phone.
- Use clear, well-lit images and write helpful captions that explain what’s happening in each photo. Blurry or dark photos don’t help your case with the Eagle board. Natural lighting works best, but if you’re working indoors or in low light, make sure your camera flash is working properly. Your captions should identify who is in the photo, what activity is taking place, and how it relates to your project goals.
- Organize your photos so they tell a logical story of your project from start to finish. The key relationship here is simple: better documentation inputs during your project create stronger Eagle board review outputs. If you treat photo organization as an afterthought, you’ll spend unnecessary time sorting through hundreds of random images. Instead, create folders on your phone or camera for “Before,” “During,” and “After” shots as you go. This system makes writing your final report much easier and helps reviewers understand the scope and impact of your work.
- Remember that photos serve as evidence of your leadership and the positive change you created in your community. They should clearly show you directing others, solving problems, and making a measurable difference. A few excellent photos that showcase your leadership will be more valuable than many unclear or irrelevant images.
Frequently Asked Questions
Do I need to include photos in my Eagle Project report?
Yes, photos are strongly recommended and help reviewers understand your project.
While the BSA doesn’t technically require photos in your Eagle Scout Service Project Final Report, including them makes a significant difference in how your board of review understands your work. Photos provide visual evidence of your leadership, planning, and the actual impact you created in your community.
Think of photos as your project’s visual story. When board members review dozens of projects, clear documentation helps yours stand out and demonstrates the thoroughness of your approach. While words may describe your work, photos illustrate the scale, the number of people you led, and the tangible results you achieved.
How many photos should I include?
Aim for a few clear photos for each stage: before, during, and after. Quality matters more than quantity. Most successful Eagle candidates include 8-12 well-chosen photos that tell their project’s complete story. You don’t need to document every single moment, but you should capture the key phases that show your leadership and the project’s progression.
Focus on photos that demonstrate specific leadership moments—you directing volunteers, explaining tasks, or problem-solving on site. Include wide shots that show the scope of work and close-ups that highlight important details. Remember, each photo should serve a purpose in telling your story.
Can I use photos taken by others?
Yes, but make sure you have permission and give credit if needed. Many Eagle candidates work with parents, troop members, or beneficiary organization staff who take photos during the project. This is perfectly acceptable and often results in better documentation since you can focus on leading while someone else captures the moments.
When using photos taken by others, simply include a note in your report acknowledging the photographer. For example: “Photos courtesy of [Name]” or “Project photos taken by parent volunteers.” This shows respect for others’ contributions and demonstrates your attention to proper attribution.
What if someone does not want their photo taken?
Always respect privacy and ask permission before including anyone in photos. This is both a matter of courtesy and legal protection. Before your project workdays begin, announce that photos will be taken for documentation and ask if anyone prefers not to be photographed.
For those who decline, you can still document your project effectively by focusing on the work itself, taking photos from angles that don’t include their faces, or asking them to step aside for specific documentation shots. Many successful projects include photos that show hands working, tools being used, or completed sections without focusing on individual faces.
Should I edit or enhance my photos?
Basic editing for brightness or cropping is fine, but do not alter the reality of your project. Simple adjustments like improving lighting, straightening horizons, or cropping for better composition are standard practice and help your photos look more professional in your final report.
However, avoid any editing that changes what actually happened. Don’t add or remove people, alter the amount of work completed, or enhance results beyond what you actually achieved. Your photos should accurately represent your project’s true scope and impact. Board members can usually tell when photos have been heavily manipulated, and authenticity builds more trust than perfection.
Being brutally honest about how your actions lead to results is a key principle in both Eagle projects and effective project leadership. Your photos should show what you truly accomplished, rather than an idealized version of events. This honest documentation demonstrates the integrity that Eagle Scout rank represents and helps future Scouts learn from your real experience.