Learning first aid prepares you to help in real emergencies.
It is about being ready to help yourself and others when it matters most. Whether you are hiking in the woods, camping with friends, or just playing outside, knowing what to do in an emergency can make all the difference.
This article covers the most important first aid skills every Scout should practice. From building your own first-aid kit to handling emergencies like bleeding, shock, and CPR, you will find clear steps and real-world tips to build confidence and keep your troop safe. Let us get started with the basics and work up to the skills that save lives.
What Every Scout Needs in a First Aid Kit
Building a proper first aid kit is one of the most important skills you’ll develop as a Scout. Whether you’re on a weekend campout or a week-long high adventure trek, having the right supplies within reach can make the difference between a minor inconvenience and a serious emergency. The key is knowing what goes in your kit, how to use each item, and where to keep it accessible.
Your basic Scout first aid kit should include seven essential categories of supplies. Start with adhesive bandages in assorted sizes to cover small cuts and scrapes. Add sterile gauze pads and gauze rolls for larger wounds that need absorption and padding. Include antiseptic wipes to clean injuries before dressing them, and medical tape to secure dressings without cutting off circulation.
Tweezers are absolutely essential for removing splinters, ticks, and debris from wounds. Pack nitrile gloves to protect both you and the injured person from blood-borne pathogens. Finally, include an emergency blanket—that lightweight, reflective sheet that prevents shock and retains body heat when someone is injured. These seven items form the foundation of any Scout’s first aid preparedness.
Make your kit fit your activities. If you’re camping where there are ticks, pack extra tweezers and antiseptic wipes. Headed to the desert? Bring more gauze and tape. Water trips need waterproof bandages. If blisters are common, add moleskin.
Learning to use each item safely requires practice in addition to reading instructions. Antiseptic wipes should be used before applying any bandage, working from the center of the wound outward. When applying gauze, use gentle but firm pressure to control bleeding without cutting off circulation. Tweezers must be cleaned with antiseptic before and after each use to prevent infection.
The video below demonstrates exactly what belongs in a Scout first aid kit and shows proper usage techniques for each essential item:
The video, presented by Eagle Scout and first aid instructor Justin Labardini, outlines the essential items for a Scout first aid kit. He emphasizes personal protection first, including gloves and eye protection, followed by core supplies like gauze pads, triangular bandages, medical tape, and a SAM splint. Additional recommended items include moleskin for blisters, antiseptic ointment, tweezers, scissors, and a notepad for recording details to share with medical personnel.
Practice assembling your own kit and memorize its location in your pack.
Keep a mini first aid kit in your daypack for quick access in an emergency. Run through scenarios with your patrol: What would you grab first for a deep cut? How would you handle a tick removal? This mental rehearsal builds the confidence you need when real situations arise.
| Item | Purpose | Tips for Use |
|---|---|---|
| Bandages | Cover wounds, stop bleeding | Keep wound clean |
| Gauze pads/rolls | Absorb blood, dress wounds | Apply gentle pressure |
| Antiseptic wipes | Clean cuts and scrapes | Use before bandaging |
| Adhesive tape | Secure dressings in place | Do not wrap too tight |
| Tweezers | Remove splinters, ticks | Clean before/after use |
| Nitrile gloves | Protect both rescuer and victim | Change between tasks |
| Emergency blanket | Prevent shock, retain warmth | Wrap around shoulders |
Regularly check and restock your kit after each camping trip. Adhesive loses its stick in extreme temperatures, antiseptic wipes dry out over time, and emergency blankets tear easily. Restock your kit after every trip. Used or damaged supplies should be replaced right away so your kit is always ready for action. A well-maintained first aid kit reflects the prepared mindset that separates Eagle Scouts from the crowd.
First Steps in Any Emergency: Staying Safe and Getting Help
When an emergency happens, your first instinct might be to rush in and help immediately. That instinct can get you hurt or killed. The most important rule in any emergency is to assess the scene for safety before you approach the injured person. Taking care of yourself enables you to help others effectively. Look around carefully before moving closer. Are there downed power lines, unstable rocks, ongoing traffic, aggressive animals, or fire? Is there broken glass, spilled chemicals, or unstable ground? Take those extra 10-15 seconds to scan the area because they could save your life. According to official Scouting America guidance, checking scene safety is the absolute first step in any emergency response.
Once you’ve determined the scene is safe, your next priority is getting professional help on the way. Call 911 (or your local emergency number if you’re outside the United States) immediately. Don’t wait for someone else. Call for help right away. When you speak to the dispatcher, stay calm and provide clear information: your exact location, what happened, how many people are injured, and what injuries you can see.
Practice makes perfect when it comes to emergency calls. During your next patrol meeting, try role-playing different emergency scenarios with your fellow Scouts. One person acts as the injured victim, another as the caller, and someone else as the 911 dispatcher. This practice builds confidence and helps you remember what information to provide when your adrenaline is pumping and every second counts.
While waiting for professional help to arrive, your job is to keep the injured person calm and comfortable. Speak in a steady, reassuring voice. Let them know that help is coming and that you’re going to stay with them. Avoid moving them unless they’re in immediate danger from the environment. Sometimes having someone nearby who remains calm can greatly influence how a victim responds to their injuries.
Universal precautions are non-negotiable in any first aid situation. Always wear nitrile gloves if you have them, and avoid direct contact with blood or other bodily fluids. If you don’t have gloves, use a barrier like a clean cloth or plastic bag. These precautions protect both you and the injured person from potential infections. The First Aid Merit Badge requirements emphasize that universal precautions must be followed in every emergency situation.
Stay with the injured person until professional help arrives and takes over. Stay with the injured person until help arrives, even if they seem okay at first. Sometimes people get worse or become confused if left alone. Your calm presence and basic first aid knowledge can literally be the difference between life and death.
| Step | What to Do | Key Safety Points |
|---|---|---|
| Check scene safety | Look for fire, traffic, unstable ground, animals | Never rush in—take 10-15 seconds to assess |
| Call for help | Dial emergency services, give clear info | Don’t assume someone else called—make the call yourself |
| Care for victim | Provide first aid, stay calm, keep them comfortable | Use universal precautions and avoid moving them unnecessarily |
Remember that emergency response is a skill that improves with practice. The more you rehearse these steps with your patrol, the more automatic they become when you actually need them. The goal is to build the confidence and muscle memory that will serve you when someone’s life depends on your actions.
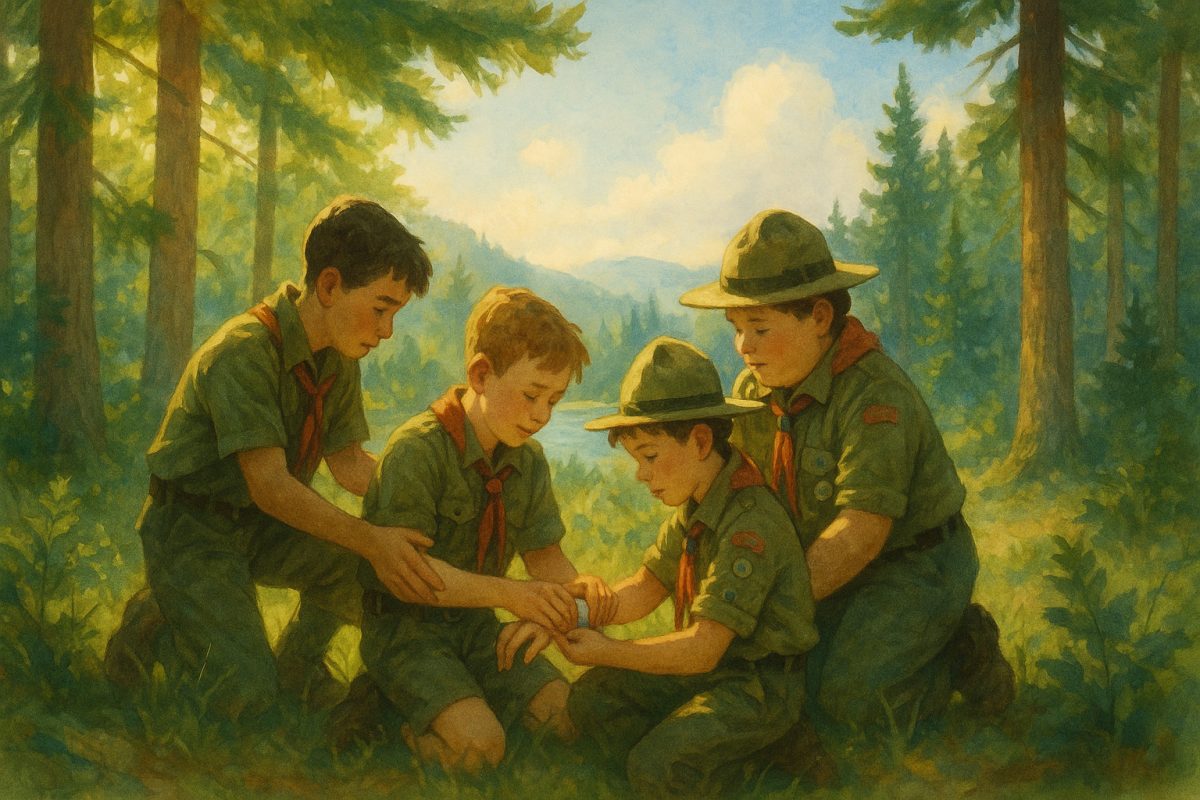
Treating Common Injuries: Bleeding, Burns, Bites, and More
When someone gets hurt on a camping trip or during a Scout activity, your ability to provide proper first aid can make the difference between a minor setback and a serious emergency. You’ll run into some injuries more than others when you’re outdoors—cuts, burns, bites, and broken bones. Knowing what to do helps you and your patrol.
Cuts and Bleeding
Most cuts you’ll see in Scouting are minor—scraped knees from hiking, small knife cuts during cooking, or scratches from branches. The basic approach is always the same: clean, apply pressure, and bandage properly.
Start by putting on gloves if you have them, then clean the wound with clean water to remove dirt and debris. For minor bleeding, apply direct pressure with a clean cloth or gauze pad directly over the wound. Don’t lift the bandage to check if the bleeding stopped, since this breaks up the clot. Just put more gauze on top if the blood soaks through.
When applying bandages, wrap firmly but not so tight that you cut off circulation. You should be able to slip one finger under the bandage. Check that fingers or toes beyond the bandage remain pink and warm, which indicates good blood flow.
Serious bleeding requires immediate emergency help. Call 911 if blood is spurting, the wound is deep enough to see fat or bone, or if bleeding doesn’t slow down after 10 minutes of direct pressure. According to the First Aid Merit Badge requirements, Scouts must know when to escalate care to professionals.
Burns and Sunburn
Burns happen frequently around campfires, camp stoves, and during cooking activities. The first step for any burn is immediate cooling with clean, cool water—never ice, which can cause additional tissue damage.
Run cool water over the burn for 10-15 minutes to stop the burning process and reduce pain. Remove any jewelry near the burn before swelling begins. For minor burns (first-degree), you can cover loosely with a clean, dry cloth after cooling.
Never put butter, oil, or ointments on a burn. These can make the injury worse or cause infection. For blisters, don’t pop them. The intact skin provides natural protection against infection.
Sunburn prevention starts with proper clothing, sunscreen (SPF 30 or higher), and seeking shade during peak sun hours. If sunburn occurs, cool baths, aloe vera, and staying hydrated help with healing. Severe sunburn with blistering, fever, or chills requires medical attention.
Bites, Stings, and Poisonous Plants
Insect stings are common during outdoor activities. For bee stings, remove the stinger by scraping it out with a fingernail or credit card—don’t use tweezers, which can squeeze more venom into the wound.
Wash the area with soap and water, then apply a cold pack for 15-20 minutes to reduce swelling and pain. Watch for signs of allergic reaction: difficulty breathing, widespread hives, rapid pulse, or swelling of face and throat. These symptoms require immediate emergency care.
Tick removal requires steady, gentle pressure with fine-tipped tweezers. Grasp the tick as close to the skin as possible and pull straight up without twisting. Clean the bite area and monitor for expanding rash or flu-like symptoms over the following weeks, which could indicate Lyme disease.
For poisonous plants like poison ivy, the key is immediate washing with dish soap and cool water to remove the oils before they bind to skin. This works best within the first hour of contact.
| Injury Type | Immediate Action | Call 911 If |
|---|---|---|
| Bleeding Cut | Clean, apply pressure, bandage | Spurting blood, deep wound, won’t stop bleeding |
| Burn | Cool with water 10-15 minutes | Large area, blistering, face/hands involved |
| Bee Sting | Remove stinger, wash, cold pack | Difficulty breathing, widespread reaction |
| Suspected Fracture | Don’t move, check circulation, splint | Bone visible, severe deformity, loss of circulation |
Sprains, Fractures, and Splinting
Distinguishing between sprains and fractures can be challenging in the field. Both cause pain and swelling, but fractures often involve visible deformity, inability to bear weight, or a grinding sensation. When in doubt, treat as a fracture.
Before moving someone with a suspected fracture, check circulation, movement, and sensation below the injury. Can they wiggle their fingers or toes? Are they pink and warm? Can they feel your touch? If any of these are compromised, this is a medical emergency.
Splinting immobilizes the injury to prevent further damage during transport. The goal is to secure the joints above and below the fracture. You can improvise splints using hiking poles, rolled magazines, or even a pillow for ankle injuries.
When applying a splint, pad bony areas and check circulation frequently. The splint should be snug enough to prevent movement but loose enough that you can slip a finger underneath. After splinting, recheck circulation, movement, and sensation to ensure the splint isn’t too tight.
For walking assists with sprains, support the injured person on their uninjured side, letting them control how much weight they put on the injured limb. Never force someone to walk if they’re experiencing severe pain or if you suspect a fracture.
Proper splinting and safe transport techniques are critical skills that require hands-on practice. The video below demonstrates professional splinting methods that every Scout should understand:
The video, led by Sam, explains the purpose of splinting—immobilizing an injured limb to reduce pain and prevent further damage in suspected fractures or dislocations. He outlines key steps: checking circulation, motion, and sensation before and after application; stabilizing the injury; sizing the splint; securing it with gauze or bandages; and using a sling if needed. The SAM splint is recommended for its versatility and portability, though improvised splints can be effective in emergencies. He emphasizes that splinting is temporary care until professional medical help is obtained.
After treating any injury, take a moment to reflect on what happened. Ask yourself: “Did I act well? How could I have acted better?” This simple habit turns every first aid situation into a learning opportunity. Maybe you realized you need to pack your first aid kit differently, or that your patrol needs to practice these skills more regularly. This kind of honest self-assessment is what transforms good Scouts into truly prepared leaders who can handle emergencies with confidence.
Life-Saving Skills: CPR, Choking, and Shock
When someone’s life is on the line, your ability to act quickly and correctly can make the difference between a close call and a tragedy. These three emergency situations—cardiac arrest, choking, and shock—require immediate response and specific techniques that every Scout should know by heart.
Quick action and confidence are essential for emergency response. Recognize the signs and practice your response until it’s automatic.
CPR and Rescue Breaths
Cardiac arrest happens when the heart stops pumping blood effectively. Signs include unconsciousness, no normal breathing, and no pulse. The person may appear blue around the lips or fingernails, and they won’t respond to shouting or gentle shaking.
Hands-only CPR is now the recommended approach for untrained bystanders. According to the American Heart Association, hands-only CPR can double or triple survival rates when performed immediately.
Start by calling 911 or having someone else make the call while you begin compressions. Place the heel of one hand on the center of the chest between the nipples, then place your other hand on top, interlocking your fingers. Push hard and fast at least 2 inches deep at a rate of 100-120 compressions per minute.
Rescue breaths are only recommended if you’re trained in CPR and have protective equipment. During the compression-only approach, don’t stop to give breaths—continuous chest compressions are more important for maintaining blood flow to the brain and heart.
If an AED (Automated External Defibrillator) becomes available, use it immediately. These devices provide voice prompts and will only deliver a shock if needed. Turn on the AED, attach the pads as shown in the diagrams, and follow the device’s instructions while continuing CPR between shocks.
Choking Response
Choking occurs when an object blocks the airway, preventing normal breathing. The universal sign is hands clutched to the throat, but also watch for inability to speak, weak coughing, or a high-pitched sound when trying to breathe.
The obstructed airway maneuver (commonly called the Heimlich maneuver) is your primary tool for helping a conscious choking victim. Stand behind the person and wrap your arms around their waist. Make a fist with one hand and place it just above their navel, then grasp it with your other hand.
Give quick, upward thrusts into the abdomen, using enough force to lift the person slightly off the ground. Perform distinct, separate thrusts instead of continuous squeezing. Continue until the object is expelled or the person becomes unconscious.
Call for emergency help immediately if the person becomes unconscious or if you can’t clear the obstruction after several attempts. If they lose consciousness, begin CPR immediately, checking the mouth for visible objects before giving rescue breaths (if you’re trained to do so).
For infants under one year, the technique is different. Hold the baby face-down along your forearm, supporting their head and neck. Give five firm back blows with the heel of your hand between the shoulder blades, then turn them over and give five chest thrusts with two fingers.
Treating for Shock
Shock is a life-threatening condition where the body’s organs don’t receive enough blood flow. Early signs include pale or clammy skin, rapid weak pulse, rapid breathing, and confusion or anxiety. The person may feel dizzy, weak, or nauseous.
Positioning is critical when treating shock, but you must assess for injuries first. If there’s no suspected injury to the head, neck, back, or legs, elevate the person’s legs 8-12 inches to help blood flow return to vital organs. This simple positioning can significantly improve circulation to the heart and brain.
Keep the person warm with blankets or extra clothing, but avoid overheating. Loosen any tight clothing around the neck or waist to improve circulation. Never give food or water to someone in shock—they may vomit and aspirate, or they may need emergency surgery.
Monitor their breathing and pulse continuously while waiting for emergency medical services. If they become unconscious and stop breathing normally, begin CPR immediately. Talk to them calmly and reassuringly if they’re conscious—emotional support helps reduce anxiety, which can worsen shock.
If someone is showing signs of shock, elevate their legs only if there is no injury to the head, neck, back, or legs. This helps blood flow to vital organs. However, if you suspect spinal injuries from a fall or accident, keep them flat and still instead of elevating anything.
The most important thing you can do for someone in shock is get professional medical help quickly while providing basic supportive care. Your role is to prevent the condition from worsening until paramedics arrive with advanced life support equipment.
These life-saving skills require regular practice to maintain proficiency. Consider taking a certified CPR course through the American Red Cross or American Heart Association to build confidence and learn the latest techniques. Your quick thinking and proper technique could save a life when it matters most.
Practicing and Teaching First Aid Skills
The difference between knowing first aid and being ready to use it comes down to practice. Reading about CPR or memorizing the steps is a start, but hands-on training with realistic scenarios builds the muscle memory and confidence needed when someone’s life depends on your actions. The American Red Cross and other certified training organizations emphasize scenario-based learning because it mirrors the stress and decision-making pressure of actual emergencies.
Realistic practice scenarios help you work through the mental checklist while your hands stay busy. Set up training sessions where one Scout plays an injured hiker with a suspected spinal injury, while another practices proper stabilization techniques. Create situations that mirror real outdoor emergencies: a Scout “unconscious” from heat exhaustion during a summer hike, or someone with a severe cut from a camp tool accident. These role-playing exercises teach you to assess the scene, prioritize care, and communicate clearly under pressure.
Teaching Others Builds Your Own Confidence
When you teach first aid skills to younger Scouts in your patrol or troop, you strengthen your own understanding. The act of explaining how to properly bandage a wound or demonstrate rescue breathing forces you to think through each step methodically. This peer-to-peer learning creates a culture where everyone feels responsible for safety, including Scouts and adult leaders alike.
Start by pairing experienced Scouts with newer members during first aid practice sessions. Have the older Scout walk through basic wound care while the younger Scout practices on a training mannequin or volunteer. This mentoring approach follows the natural progression in Scouting: younger Scouts look up to middle-aged Scouts, who in turn learn from the older, more experienced members. When you’re teaching someone else, you quickly discover which parts of the process you truly understand and which areas need more work.
The best way to reinforce learning is to rotate teaching responsibilities. One week, you might lead a session on treating burns. The next week, another Scout takes charge of choking response training. This system ensures everyone gets comfortable both performing and instructing first aid techniques.
Keeping Skills Sharp Through Regular Review
First aid skills deteriorate quickly without regular practice—studies show that CPR proficiency drops significantly within just six months of initial training. Schedule monthly first aid review sessions with your patrol or troop, focusing on different scenarios each time. One month might emphasize wilderness injuries like snake bites or hypothermia, while another focuses on common camping accidents like cuts from knives or burns from camp stoves.
Create a simple tracking system to monitor which skills your group has practiced recently. To master any skill, you need to be ruthlessly honest about the relationship between your specific practice sessions (inputs) and your actual readiness to respond (outputs). If someone struggles with proper hand placement during CPR practice, focus on more repetition of that specific technique rather than general first aid review.
Practicing first aid scenarios outdoors adds realism that indoor training can’t match. You’ll learn to work around uneven ground, poor lighting, and weather conditions that could complicate real emergencies. The video below demonstrates effective outdoor first aid training techniques that troops can implement during regular meetings or camping trips.
While troop-level practice builds confidence, certified training through organizations like the American Red Cross, American Heart Association, or NOLS Wilderness Medicine provides the depth and credibility that serious outdoor leaders need. Scouting America’s Wilderness First Aid program requires participants to be at least 14 years old and hold current CPR/AED certification as prerequisites.
CPR and AED certification should be your first priority. These life-saving skills have the highest impact in emergency situations, and the certification process includes hands-on practice with feedback from qualified instructors. Many councils offer CPR training during summer camp or special weekend events, making it accessible for entire troops to get certified together.
Wilderness First Aid (WFA) certification takes your skills to the next level, covering scenarios specific to remote outdoor environments where professional medical help might be hours away. The 16-hour WFA course includes training on improvised splints, evacuation techniques, and extended patient care—skills that become critical when you’re leading backpacking trips or high-adventure activities. American Red Cross Wilderness First Aid and similar programs focus heavily on decision-making in remote settings.
For Scouts planning to work at summer camps or lead extensive outdoor programs, Wilderness First Responder (WFR) certification provides even more comprehensive training. This 80-hour course covers advanced assessment techniques, medication administration, and complex evacuation scenarios that prepare you for leadership roles in outdoor education.
| Certification Level | Duration | Best For | Key Skills Covered |
|---|---|---|---|
| CPR/AED | 4-6 hours | All Scouts 14+ | Cardiac emergencies, choking response |
| Wilderness First Aid | 16 hours | Patrol leaders, outdoor enthusiasts | Remote care, improvised equipment, evacuation |
| Wilderness First Responder | 80 hours | Camp staff, expedition leaders | Advanced assessment, extended care, medications |
Using Resources and Tracking Your Progress
Create a personal first aid skills checklist that tracks both your training dates and practical experience with each technique. Include items like “CPR certification current,” “practiced splinting techniques in last 30 days,” and “taught wound care to another Scout this month.” This systematic approach ensures you maintain proficiency across all essential skills.
The First Aid Merit Badge requirements provide an excellent framework for tracking your development. Even if you’ve already earned the badge, the requirements serve as a comprehensive checklist for ongoing skill maintenance. Review the scenarios periodically and practice them with different patrol members to keep your responses sharp and adaptable.
Keep a simple log of your first aid practice sessions, noting which scenarios you worked on and areas that need improvement. When you practice treating someone for shock, write down whether you remembered to check for spinal injuries before elevating their legs. Assessing your performance honestly helps you develop skills faster.
Consider partnering with local emergency services for advanced training opportunities. Many fire departments and EMS services offer community education programs that welcome Scout groups. These partnerships provide access to professional-grade training equipment and real-world perspectives that enhance your understanding of emergency response beyond what any manual can teach.
Quick Takeaways
Every Scout should know how to assemble and use a personal first-aid kit.
- Your kit is your primary tool for handling emergencies in the backcountry or at home. According to the official Scouting America first aid guidelines, a well-stocked personal kit should include adhesive bandages, sterile gauze pads, medical tape, antiseptic wipes, and emergency contact information. The difference between having these supplies and knowing how to use them properly can determine whether a minor injury stays minor or becomes something worse.
- Scene safety and calling for help are the first priorities in any emergency. Before you touch a single bandage or check on an injured person, you need to make sure the area is safe for both you and the victim. The American Red Cross emphasizes that checking for hazards like traffic, fire, or unstable terrain comes before any medical intervention. If the scene isn’t safe, you can’t help anyone—and you might become another casualty.
- Calling for professional help should happen as soon as you determine someone needs medical attention beyond basic first aid. Don’t wait to see if the situation improves on its own. Emergency responders would rather be called and not needed than needed and not called.
- Basic skills like wound care, CPR, and treating shock save lives. These aren’t theoretical concepts you’ll never use—they’re practical skills that Scouts regularly need during camping trips, service projects, and everyday activities. Proper wound cleaning and bandaging prevents infections that could turn a simple cut into a serious medical problem. CPR knowledge means you can respond effectively if someone’s heart stops or they stop breathing. Understanding how to recognize and treat shock can prevent a manageable injury from becoming life-threatening.
- The key is understanding that first aid isn’t about performing miracles. It’s about stabilizing someone’s condition and preventing further harm until professional medical help arrives.
- Practice and certified training build real confidence and readiness. Reading about first aid techniques provides knowledge, but performing them under pressure requires practice. Regular hands-on practice with realistic scenarios helps you develop the muscle memory and decision-making skills you’ll need during an actual emergency. Many Scouts discover that their first real emergency feels less overwhelming because they’ve already worked through similar situations during training sessions.
- Certified courses like CPR/AED training and wilderness first aid provide structured learning that goes beyond basic Scout requirements. These programs teach you to recognize the specific inputs that create successful outcomes—proper hand placement for chest compressions, the correct pressure for controlling bleeding, and the systematic approach to patient assessment that prevents you from missing critical signs.
Frequently Asked Questions
What are the most important first aid skills for Scouts?
The core first aid skills every Scout should master include bandaging wounds, performing CPR, treating shock, recognizing heart attack signs, and safely moving injured persons. These five skills form the foundation of emergency response because they address the most common and life-threatening situations you’ll encounter in the field.
Bandaging wounds properly prevents infection and controls bleeding, while CPR can literally restart someone’s heart when performed correctly. Shock treatment keeps blood flowing to vital organs, and recognizing heart attack symptoms means you can get help before it’s too late. Safe patient movement prevents spinal injuries from becoming permanent disabilities.
According to the official First Aid Merit Badge requirements, Scouts must demonstrate proficiency in all these areas to earn their badge. The skills build on each other—you can’t treat shock effectively if you don’t know how to position someone safely.
How often should Scouts practice first aid skills?
Practice first aid skills regularly through troop activities and refresh your training at least twice a year. The American Red Cross recommends annual recertification for CPR, but muscle memory for bandaging and patient assessment fades much faster than that.
Monthly troop meetings should include at least one first aid scenario every quarter. This keeps skills sharp and builds confidence under pressure. Many troops dedicate one campout per year specifically to first aid training, running realistic scenarios that test decision-making alongside technical skills.
The key is changing your practice inputs to match real conditions. If you only practice bandaging on willing volunteers in a warm meeting room, you won’t be ready to treat an actual injury on a cold, muddy trail. Effective practice means working with uncooperative “patients,” limited supplies, and time pressure.
Can Scouts teach first aid to others?
Yes, teaching first aid to peers helps reinforce your own skills and builds troop safety. The best way to test your knowledge is explaining it to someone else. When you teach a skill, you have to break it down into clear steps and anticipate questions you might not have considered.
Many Eagle Scout projects focus on first aid education because it serves the community while strengthening leadership skills. Teaching younger Scouts creates a culture of safety within your troop and ensures knowledge transfers between age groups.
However, formal instruction requires proper certification. You can demonstrate techniques and share knowledge informally, but teaching official first aid courses requires instructor certification from organizations like the American Red Cross or American Heart Association.
Do Scouts need special certifications for first aid?
Basic first aid and CPR training are strongly recommended, and advanced courses like wilderness first aid are essential for Scouts who camp frequently. While the First Aid Merit Badge covers fundamental skills, it doesn’t replace formal certification from recognized organizations.
CPR certification through the American Red Cross or American Heart Association provides standardized training that’s recognized nationwide. These courses update regularly to reflect current medical guidelines and provide wallet cards that prove your competency to employers and volunteer organizations.
Wilderness First Aid (WFA) certification is particularly valuable for Scouts who spend time in remote areas. WFA courses teach improvisation techniques and extended care protocols for situations where professional help is hours away. The National Association for Search and Rescue notes that WFA training includes improvised splinting, makeshift stretchers, and patient care during extended evacuations.
| Certification Type | Duration | Best For | Renewal Period |
|---|---|---|---|
| Basic First Aid/CPR | 4-8 hours | All Scouts | 2 years |
| Wilderness First Aid | 16-20 hours | Frequent campers | 3 years |
| Wilderness First Responder | 80+ hours | Crew leaders, guides | 3 years |
What should I do if I do not have all the supplies in my kit?
Improvise with clean cloth, clothing, or other safe materials until you can get proper supplies. Real emergencies rarely happen when you’re fully prepared, so improvisation skills matter more than having perfect equipment.
A clean t-shirt can become bandages, a hiking pole transforms into a splint, and a backpack serves as a stretcher. The First Aid Merit Badge pamphlet emphasizes that “the most important first aid tool is your knowledge and ability to think clearly under pressure.”
The key is maintaining sterile technique even with improvised materials. Rinse cloth with clean water if possible, avoid materials that shed fibers into wounds, and prioritize stopping bleeding over perfect bandaging technique. A crude but effective bandage applied quickly beats a perfect one applied too late.
Practice improvisation during troop meetings by removing items from your first aid kit and working through scenarios. This builds confidence and teaches you to assess what’s truly essential versus what’s merely convenient. Remember that professional help is your goal—your job is keeping someone stable until real medical care arrives.